
Mobile Preset Installation Steps

Step 1 -
First thing’s first: download the Lightroom Mobile app (it's free!) & create an account.

Step 2 -
Download your preset pack/s by clicking the link in the email sent to your provided email address, please note this download link will expire after 24 hours.
For the following steps, we have found that downloading the files directly to your desktop & sending them to your phone via Airdrop, DropBox, Google Drive or email is the easiest option. From there you would add the ‘DNG’ preset image files from your phones camera roll (they may look blank at first, but don't stress –once in Lightroom they work perfectly!) into the Lightroom app & then follow steps 12 onwards. However, if you need to download them directly from your phone then continue to follow the steps listed below.

Step 3 - tap the ‘Download’ option on your .zip file
Step 4 - tap the ‘Open in…’ option on your file
Step 5 - tap ‘Open in downloads’

Step 6 - tap on the .zip file to unzip your preset folder.
Step 7 - once your folder is unzipped, tap to open it.

Step 8 -
Once your preset folder is open, tap the three dots in the top right corner and click ‘select’ from the dropdown menu.

Step 9 -
Select each preset file by tapping its icon.

Step 10 -
Click the share icon in the bottom left corner & scroll through the menu items until you see the Lightroom app icon. Tap on this. If it is not listed in your menu then scroll across until you see the ‘more’ option & tap that to find the Lightroom option.

Step 11 -
Select the ‘Launch Lightroom Now’ option from the pop up.

From here, your ‘DNG’ files should automatically import to your Lightroom Mobile App & display with their preset name.

Step 12 -
Click the arrow in the top left corner & scroll to find ‘ALBUMS’. Click the + sign next to albums & select create new album. Name it either ‘Solside Studio Presets’ or after the preset collection you have bought (e.g ‘West Coast Collection’) & make sure all boxes are ticked. This will help to keep your presets organised.

Step 13 -
Click on the first image, tap the three dots in the top right corner & then click ‘Create Preset’.

Step 14 -
Name your new preset after its file name (e.g ‘Esperance Blues (vibrant)) & select the preset group you want it in. Click the tick option in the top right corner to save your new preset & continue this process until you have saved all of your presets.

Step 15 -
Enjoy editing with your brand new presets! We always suggest starting by adjusting the exposure as this varies greatly for each individual photo. Have fun with it & we can’t wait to see what you create!
p.s - don't worry if a preset name is in italics – it will still work on your image!
Desktop Preset Installation Steps
Luckily, the desktop preset installation process is much easier than the mobile process. Start by downloading your presets by clicking the link provided in your email - your desktop should automatically unzip this file for you once you click on it.
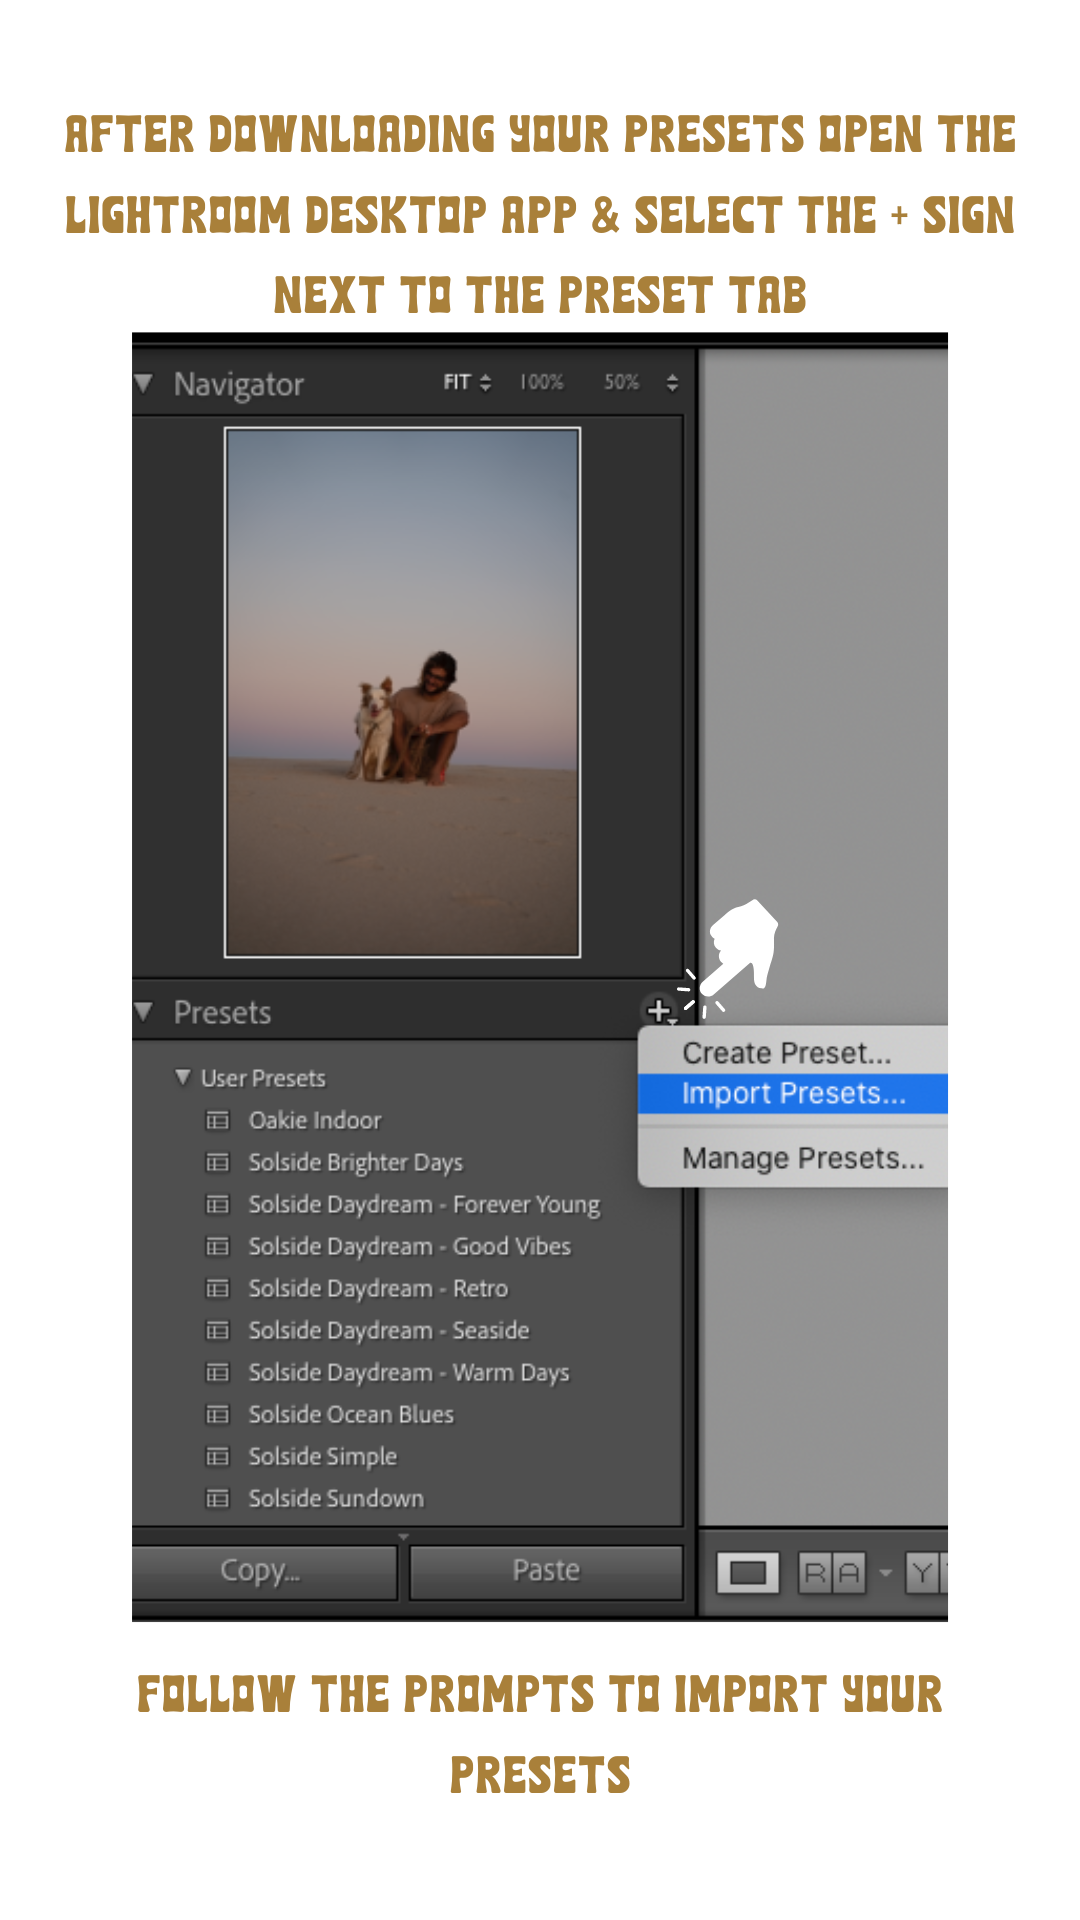
From there, open up your Lightroom desktop app & click the ‘+’ sign next to the ‘Presets’ tab. Hit ‘Import Presets’ & follow the prompts to import your new presets. Don’t forget to create an album for them to keep them organised. Happy editing!


